
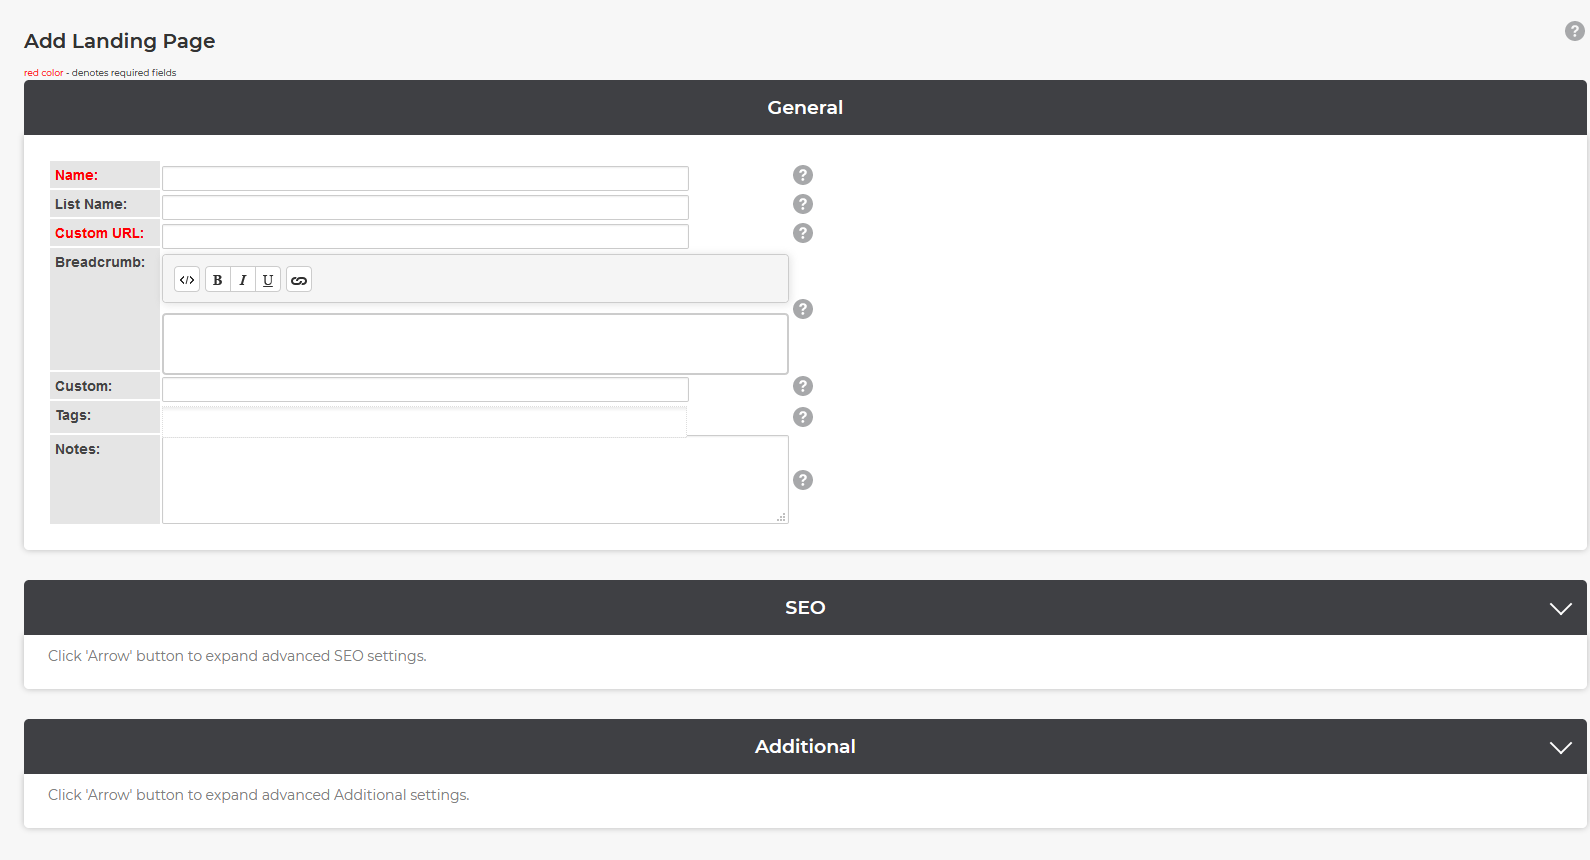
Product Listing Landing Page
Creating a Product Listing Landing Page
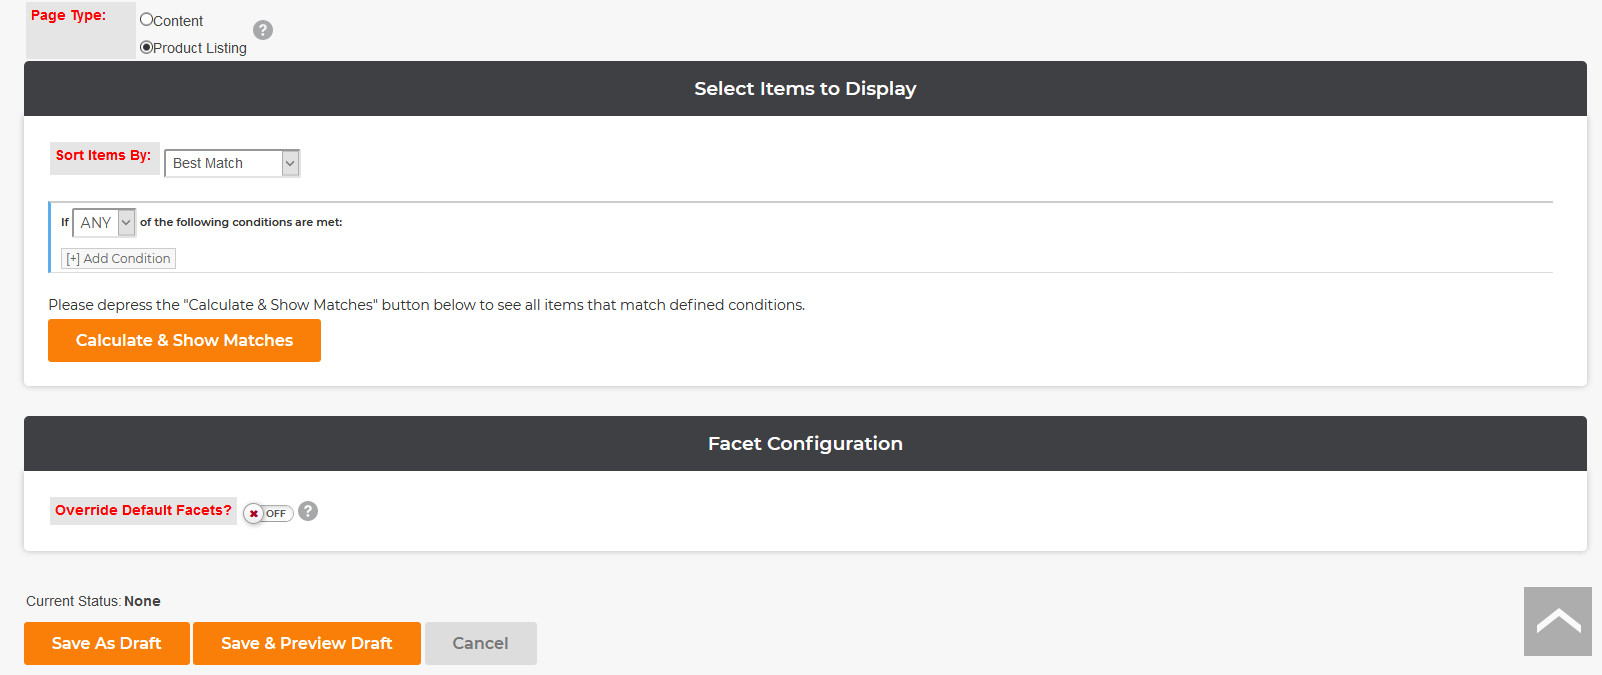
If you choose "Product Listing", two additional sections will appear: "Select Items to Display" and "Facet Configuration."
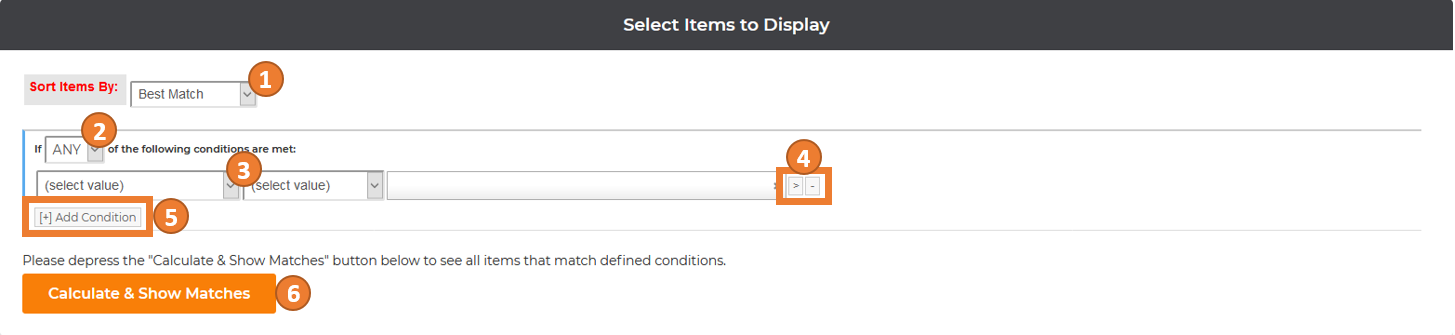
Selecting Items to Display
-
First, choose how to sort items by. Use the drop down to see all options.
-
To set the parameters for the condition, start by selecting whether ANY or ALL conditions will need to apply in order for the items to display.
-
Then, choose the field that will trigger the items displayed. Once you select a field, you will be prompted to choose an operator from the provided options based on the selected field. Choose one of these operators from the drop-down. Finally, enter the keyword or value that will trigger the items. To create a rule using a null value, use "{{empty}}" in the value field.

- You can delete a condition by clicking the minus sign to the right of the condition. You can add a sub-condition by clicking the arrow to the right of the condition.
- Additionally, you can add an independent condition by clicking the "Add Condition" button in the lower left-hand corner.
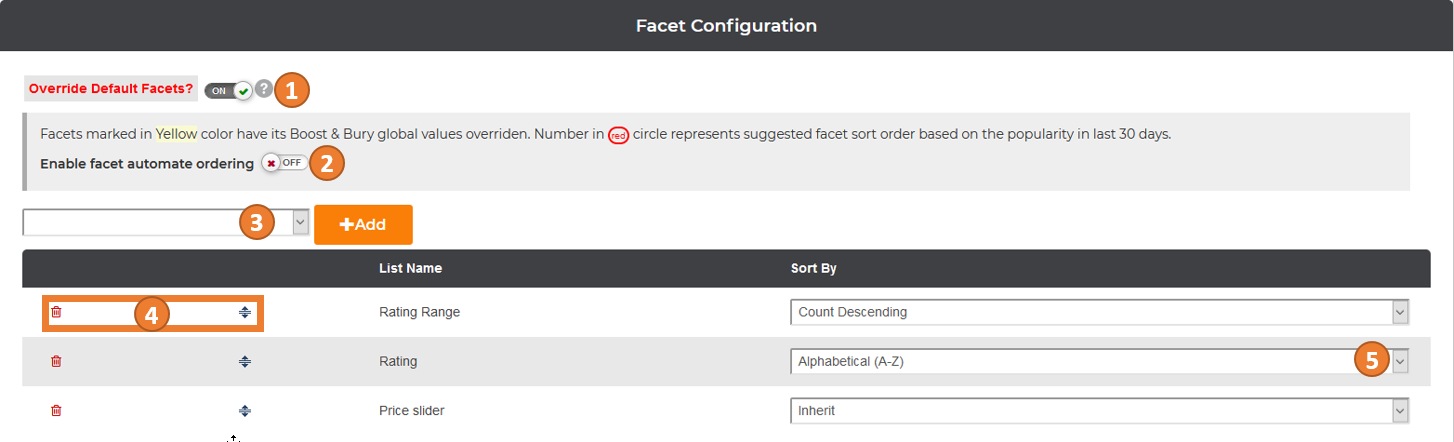
Facet Configuration
-
“Overriding the Default Facets” allows you control what left hand navigation options are presented on your landing pages. It can simplify the facets so that only the most appropriate choices are available to customers on your custom landing page. Switching this option to “Off” will return the normal left hand navigation for the items being returned in the search results/landing page.
-
Next, specify whether you would like to “Enable facet automate ordering” by using the radio button.
-
Now, add each facet individually by selecting the facet and pressing “Add”.
-
To edit a facet, click on the pencil icon. To delete a facet, click on the trash can icon. To change the order of how the facets appear, click on the double arrow next to the facet you would like to move and drag it to a new location on the list. The order in which the facets are listed corresponds to the order that the facets will appear on the Landing Page.
-
Lastly, use the drop down to choose how the facet is sorted by.
Save and Confirm the addition of the Product Listing Landing Page

-
Once you have all the changes for your Product Listing Landing Page, you will now need to save the Landing Page.
-
Additionally, if you would like to view the Landing Page, press the “Save and Preview” button.
-
If you would like not save any changes made, press “Cancel”.
-
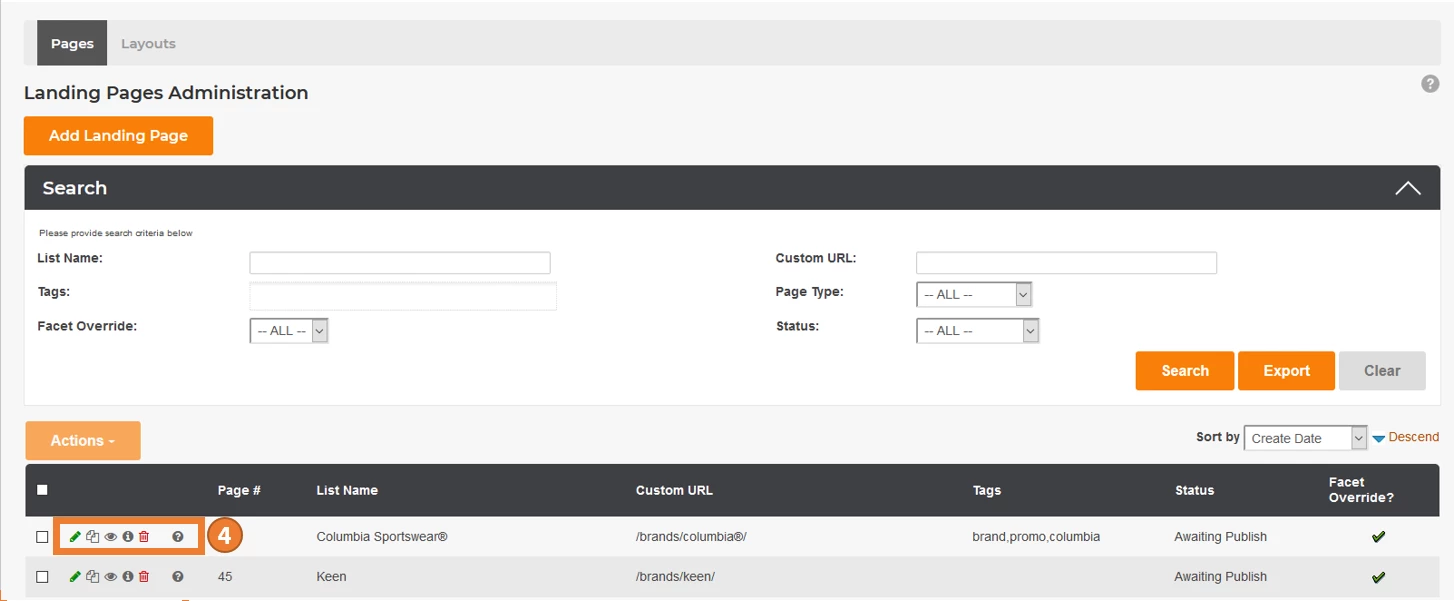
On the Landing Pages Administration Page, you can now view your newly created or updated Landing Page. Mousing over the "Eye" icon will let you view your Landing Page. Mousing over the “Information” icon will display rule/s for the items to display. Mousing over the "?" icon will display the date the rule was created and when it was last modified.